Bulk Operations

The Bulk Operations feature provides a central hub for performing actions on multiple accounts simultaneously. From reassigning collectors to scheduling mass communications, this powerful interface streamlines account management tasks that would otherwise require repetitive individual actions.
Overview
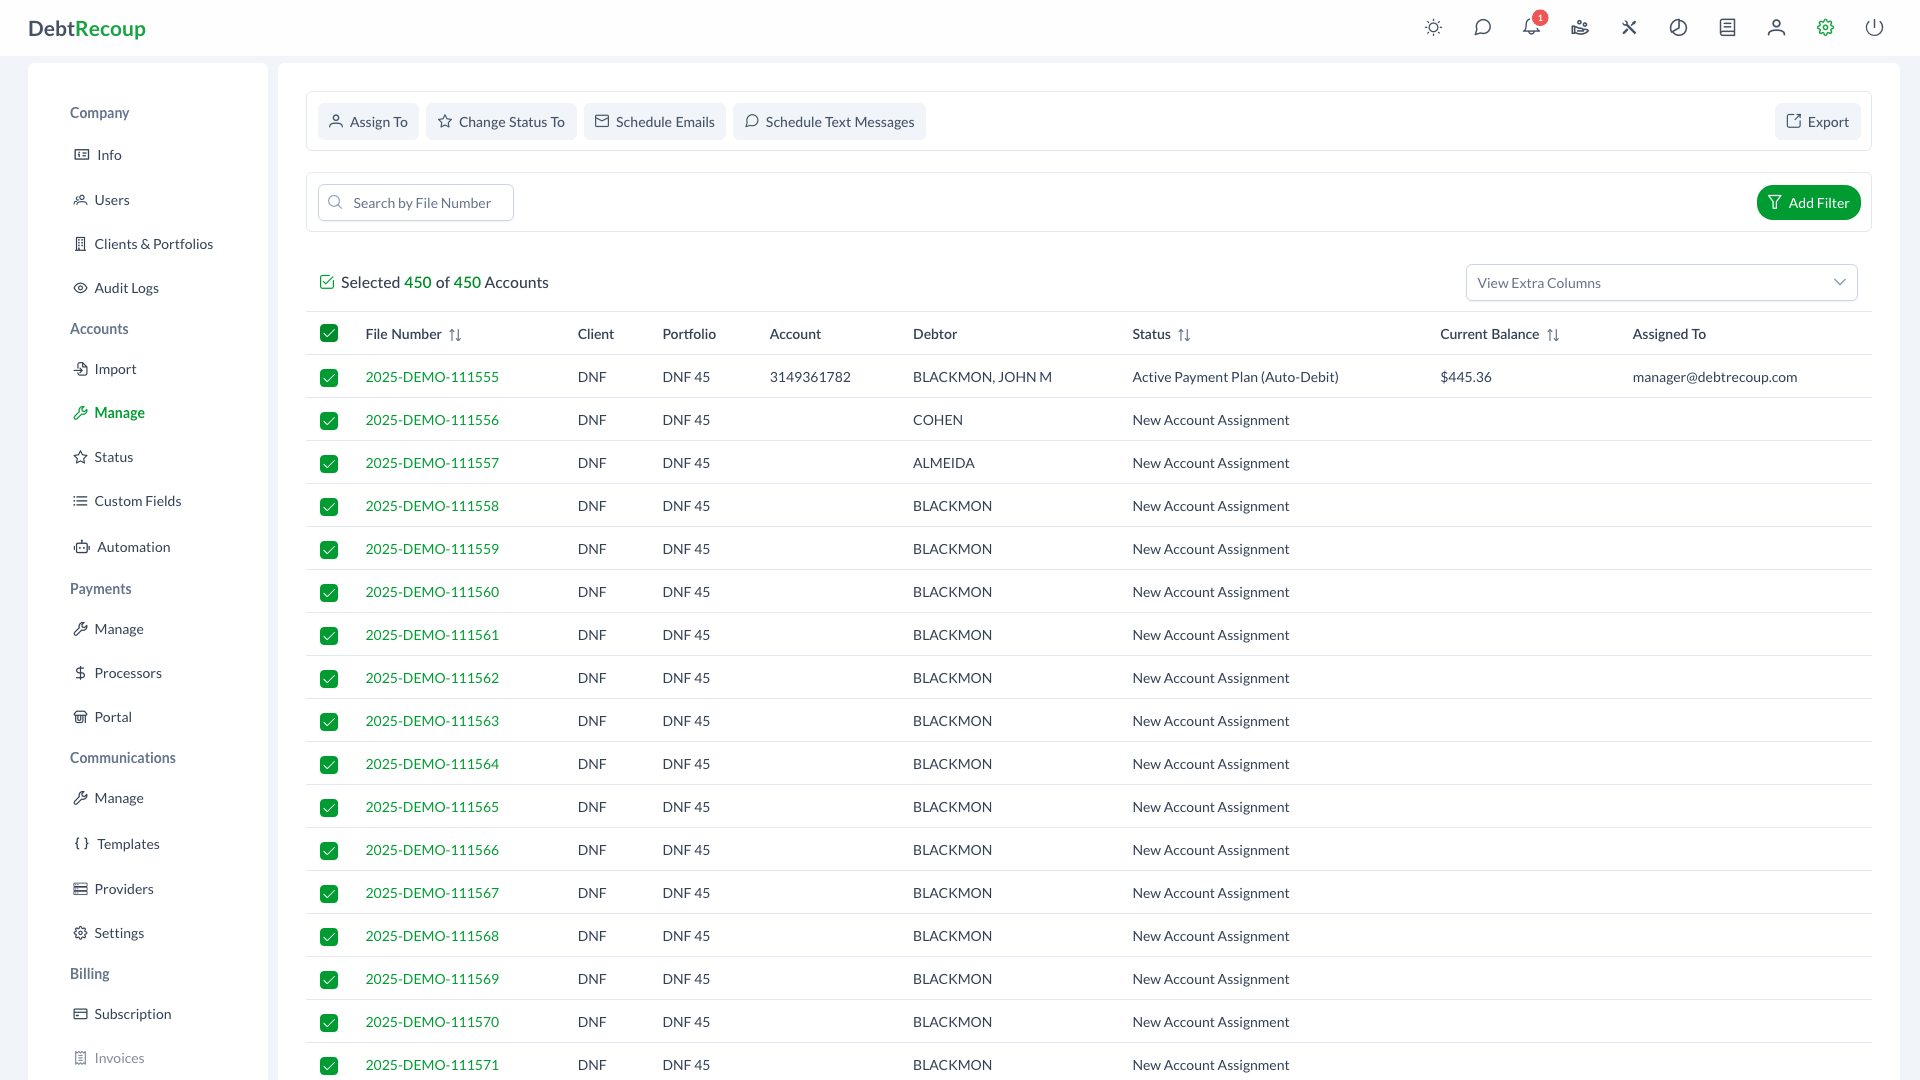
The Bulk Operations interface displays accounts in a data grid with selection capabilities. The toolbar at the top provides quick access to all available bulk actions, which become enabled once you select one or more accounts. A real-time counter shows how many accounts you have selected out of the total available.
Core Data Columns
The default view displays essential account information:
| Column | Description |
|---|---|
| File Number | Internal reference number (clickable to open account) |
| Client | Client associated with the account |
| Portfolio | Portfolio the account belongs to |
| Account | Account number |
| Debtor | Primary debtor name |
| Status | Current account status |
| Current Balance | Amount currently owed |
| Assigned To | Collector currently assigned to the account |
Optional Columns
Click the column selector dropdown to add additional columns:
- Creditor: Original creditor name
- Last Worked: Date account was last worked
- Last Payment Amount: Amount of most recent payment
- Last Payment Date: Date of most recent payment
- State: Debtor's state of residence
- Declined Transactions: Count of declined payment attempts
Key Benefits
- Time Savings: Perform actions on hundreds or thousands of accounts in a single operation
- Consistency: Apply the same changes uniformly across selected accounts
- Flexibility: Choose between manual selection and select-all for large batches
- Tracking: Monitor bulk operation progress with real-time status updates
- Precision: Exclude specific accounts even when using select-all mode
Selecting Accounts
Manual Selection
Click the checkbox next to individual accounts to select them. The selection counter in the table header updates in real-time to show your current selection count.
- Browse or filter to find target accounts
- Click the checkbox next to each account you want to include
- The toolbar buttons become enabled once at least one account is selected
Select All
Use the header checkbox to select all accounts matching your current filter criteria:
- Apply any desired filters to narrow the account list
- Click the checkbox in the table header row
- All accounts matching the current filter are selected (not just the visible page)
- The selection counter displays the total selected count
Excluded Account Tracking
When using Select All, you can uncheck individual accounts to exclude them from the operation. The system tracks these exclusions separately, ensuring they are not affected by the bulk action even though the rest of the filtered results are included.
Available Bulk Actions
Assign To Collector
Reassign selected accounts to one or more collectors.
- Select the target accounts
- Click Assign To in the toolbar
- In the dialog, search for and select a collector
- Click the plus button to add them to the assignment list
- Specify the number of accounts to assign to each collector
- Optionally enable Credit Payments to transfer payment credit:
- All: Credit all payments to the new collector
- Pending Only: Credit only pending payments
- Click Assign to execute
Unassign Option
Select "Unassign" from the collector dropdown to remove collector assignments from accounts.
Random Distribution: When assigning fewer accounts than selected, or when distributing across multiple collectors, accounts are randomly assigned to meet the specified counts.
For detailed reassignment workflows, see Mass Reassignment.
Change Status
Update the status of multiple accounts at once.
- Select the target accounts
- Click Change Status To in the toolbar
- Select the new status from the dropdown
- Click Change to apply
For detailed step-by-step instructions, see Bulk Status Change.
Schedule Communications
Send bulk emails or text messages to selected accounts.
Schedule Emails
- Select accounts with valid email addresses
- Click Schedule Emails in the toolbar
- Choose the scheduled send date
- Select an email template from the dropdown
- Click Schedule Emails to queue the messages
Schedule Text Messages
- Select accounts with valid phone numbers
- Click Schedule Text Messages in the toolbar
- Choose the scheduled send date
- Select an SMS template from the dropdown
- Click Schedule Text Messages to queue the messages
Approval Workflow
If you do not have permission to process emails or text messages directly, you will see a Send for Approval button instead. Communications will be queued for supervisor approval before sending.
Export Accounts
Download account data for the selected accounts.
- Select the accounts to export
- Click Export in the toolbar
- Optionally select a saved export template
- Choose the export format (CSV currently supported)
- Select which columns to include in the export
- For each column, choose whether to mask sensitive data
- Click Export to generate and download the file
Best Practices
Before Bulk Operations
- Filter First: Apply filters to narrow your selection before using Select All
- Verify Count: Always check the selection counter to confirm you have the expected number of accounts
- Test Small: For new operation types, try with a small selection first
During Operations
- Monitor Progress: Large operations show a progress indicator; do not close the browser
- Avoid Duplicates: Wait for one bulk operation to complete before starting another
After Operations
- Review Results: Check a sample of affected accounts to verify changes applied correctly
- Check Audit Logs: Review the audit trail for bulk operations
Related Topics
- Mass Reassignment - Detailed reassignment workflows
- Bulk Status Change - Detailed status change instructions
- Manage Accounts - Full account management interface
- Status Configuration - Configure available statuses
- Email Templates - Email and SMS templates