User Management
User Management allows administrators to create, modify, and control user access to the DebtRecoup system.
Accessing User Management
- Click the Administrator button (gear icon) in the top navigation bar
- Select Company from the left sidebar
- Click on Users
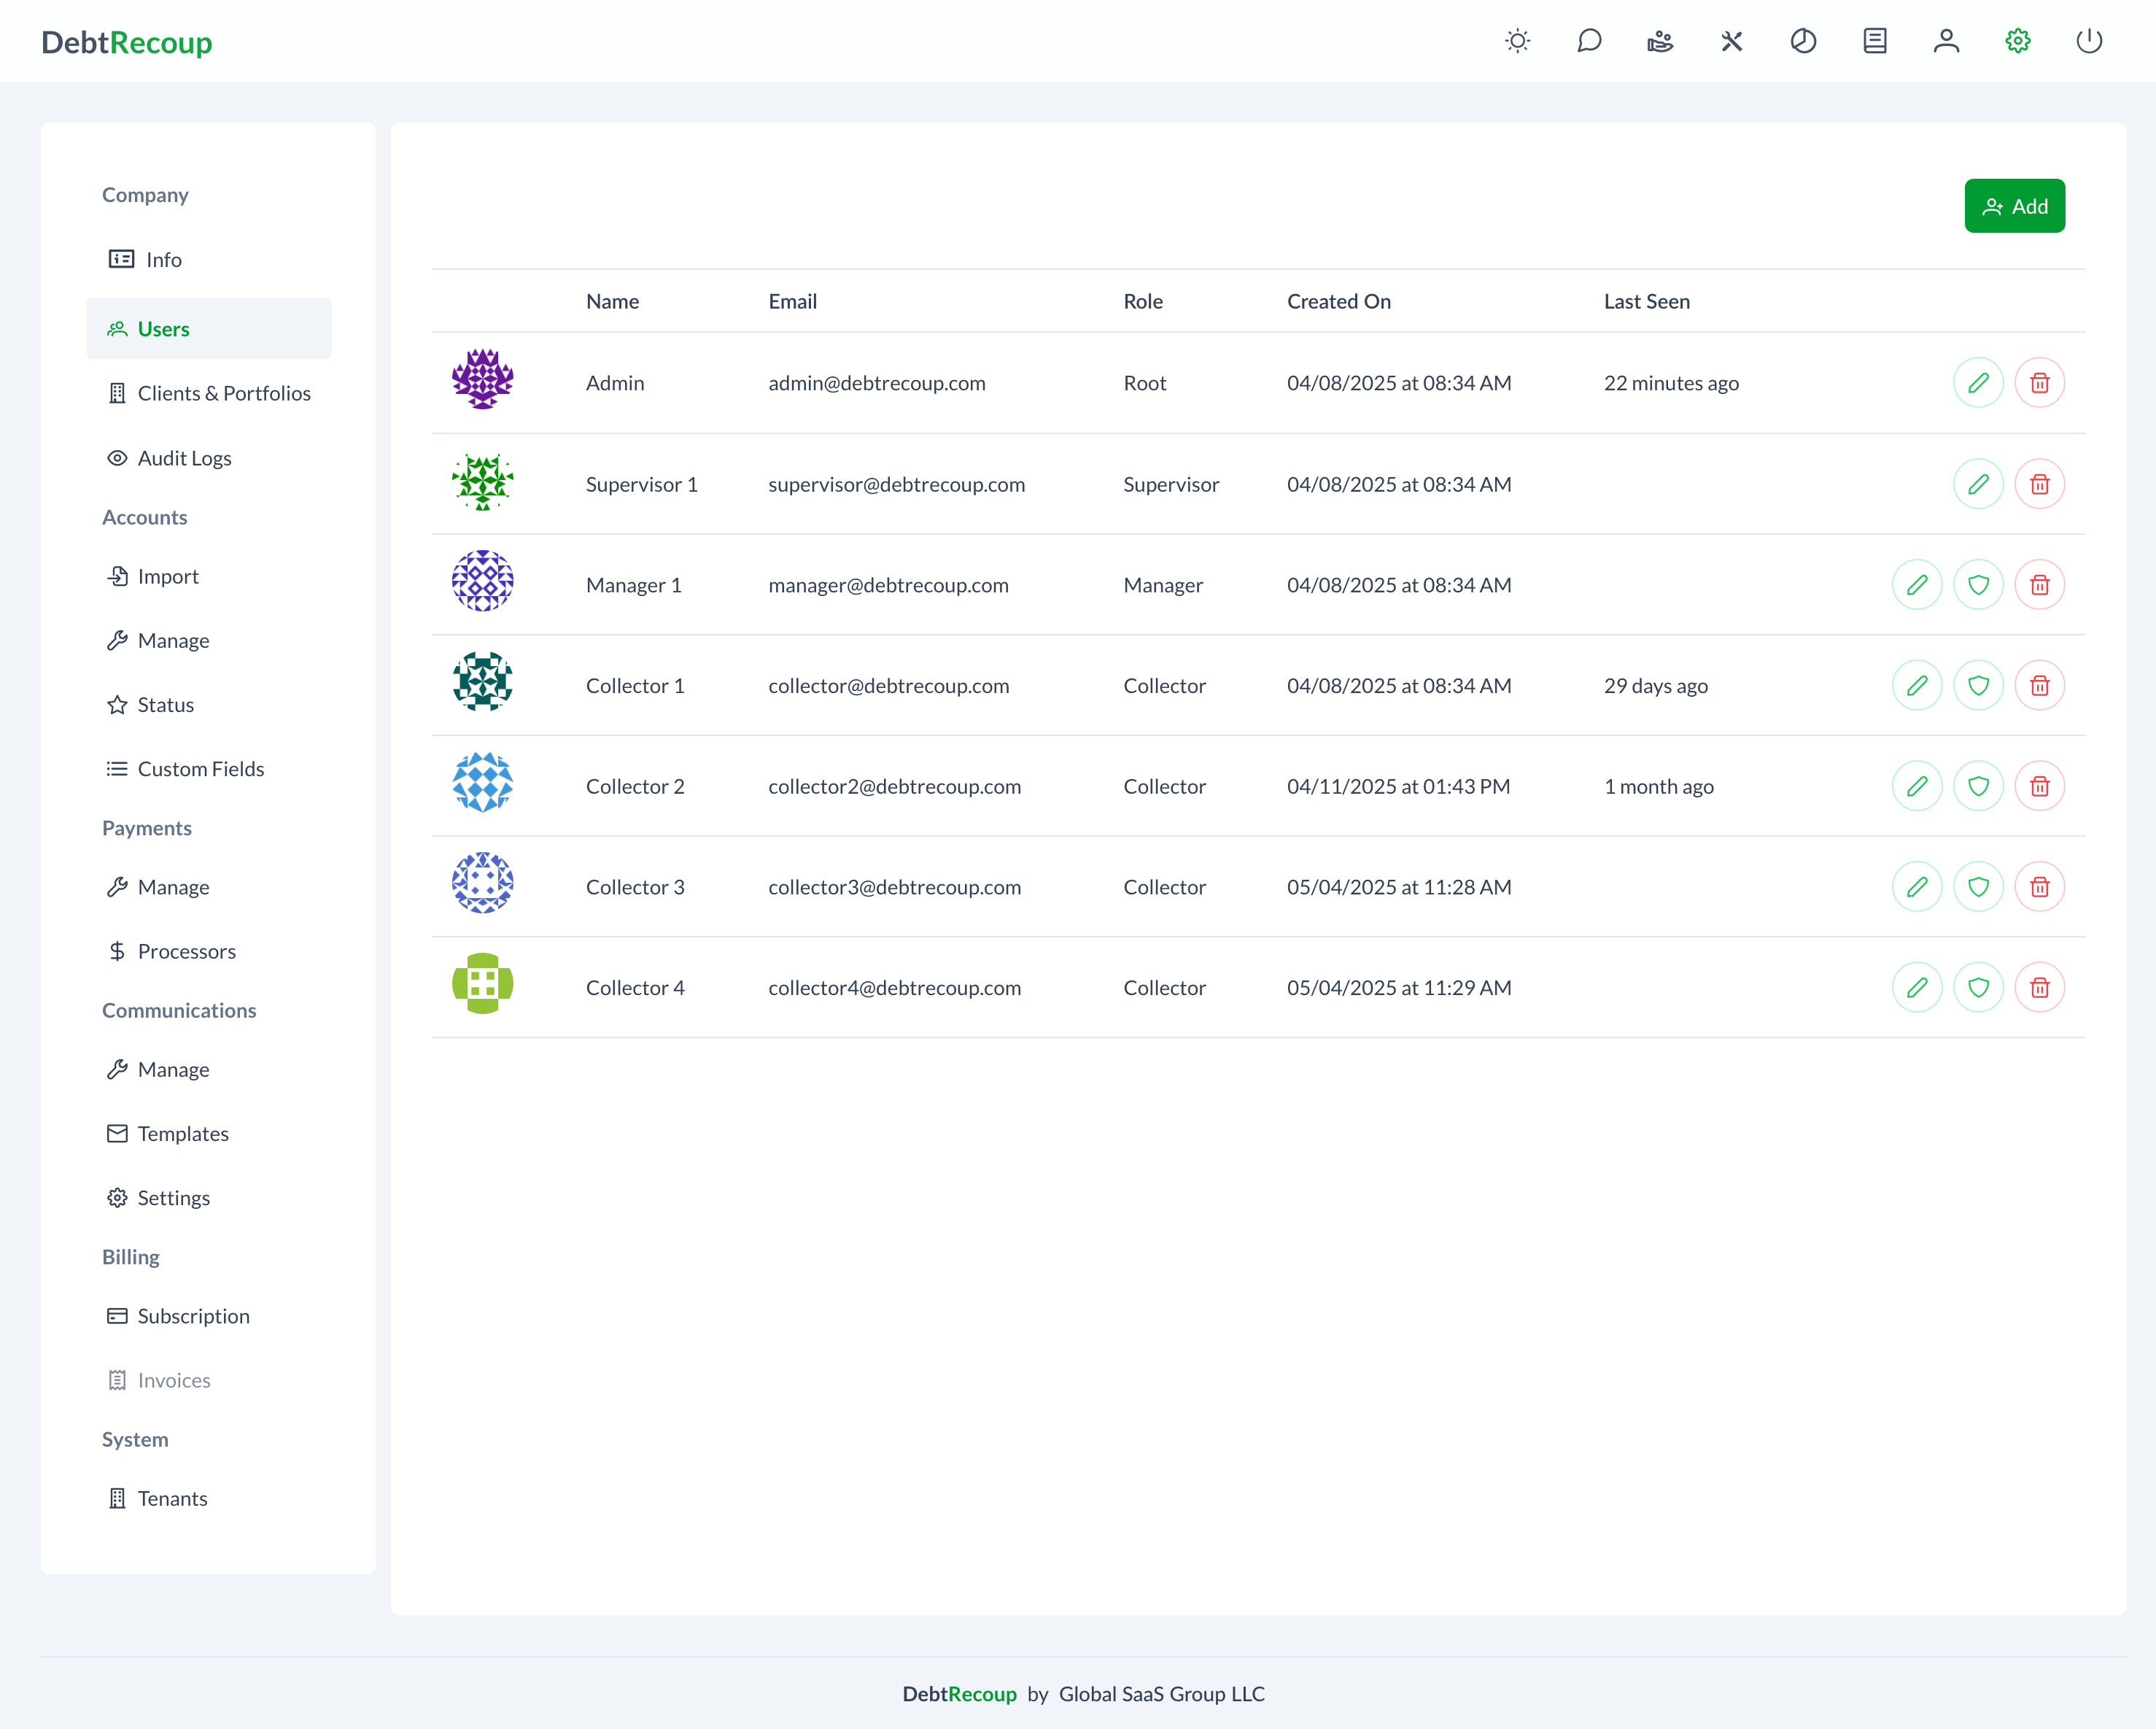
User List
The user list displays:
| Column | Description |
|---|---|
| Name | User's full name |
| Login email address (username) | |
| Role | User's assigned role |
| Created On | When the account was created |
| Last Seen | Most recent system access |
| Actions | Edit, Permissions, and Delete buttons |
Creating New Users
To add a new user:
- Click the Add button (green button with plus icon)
- Fill in the required information:
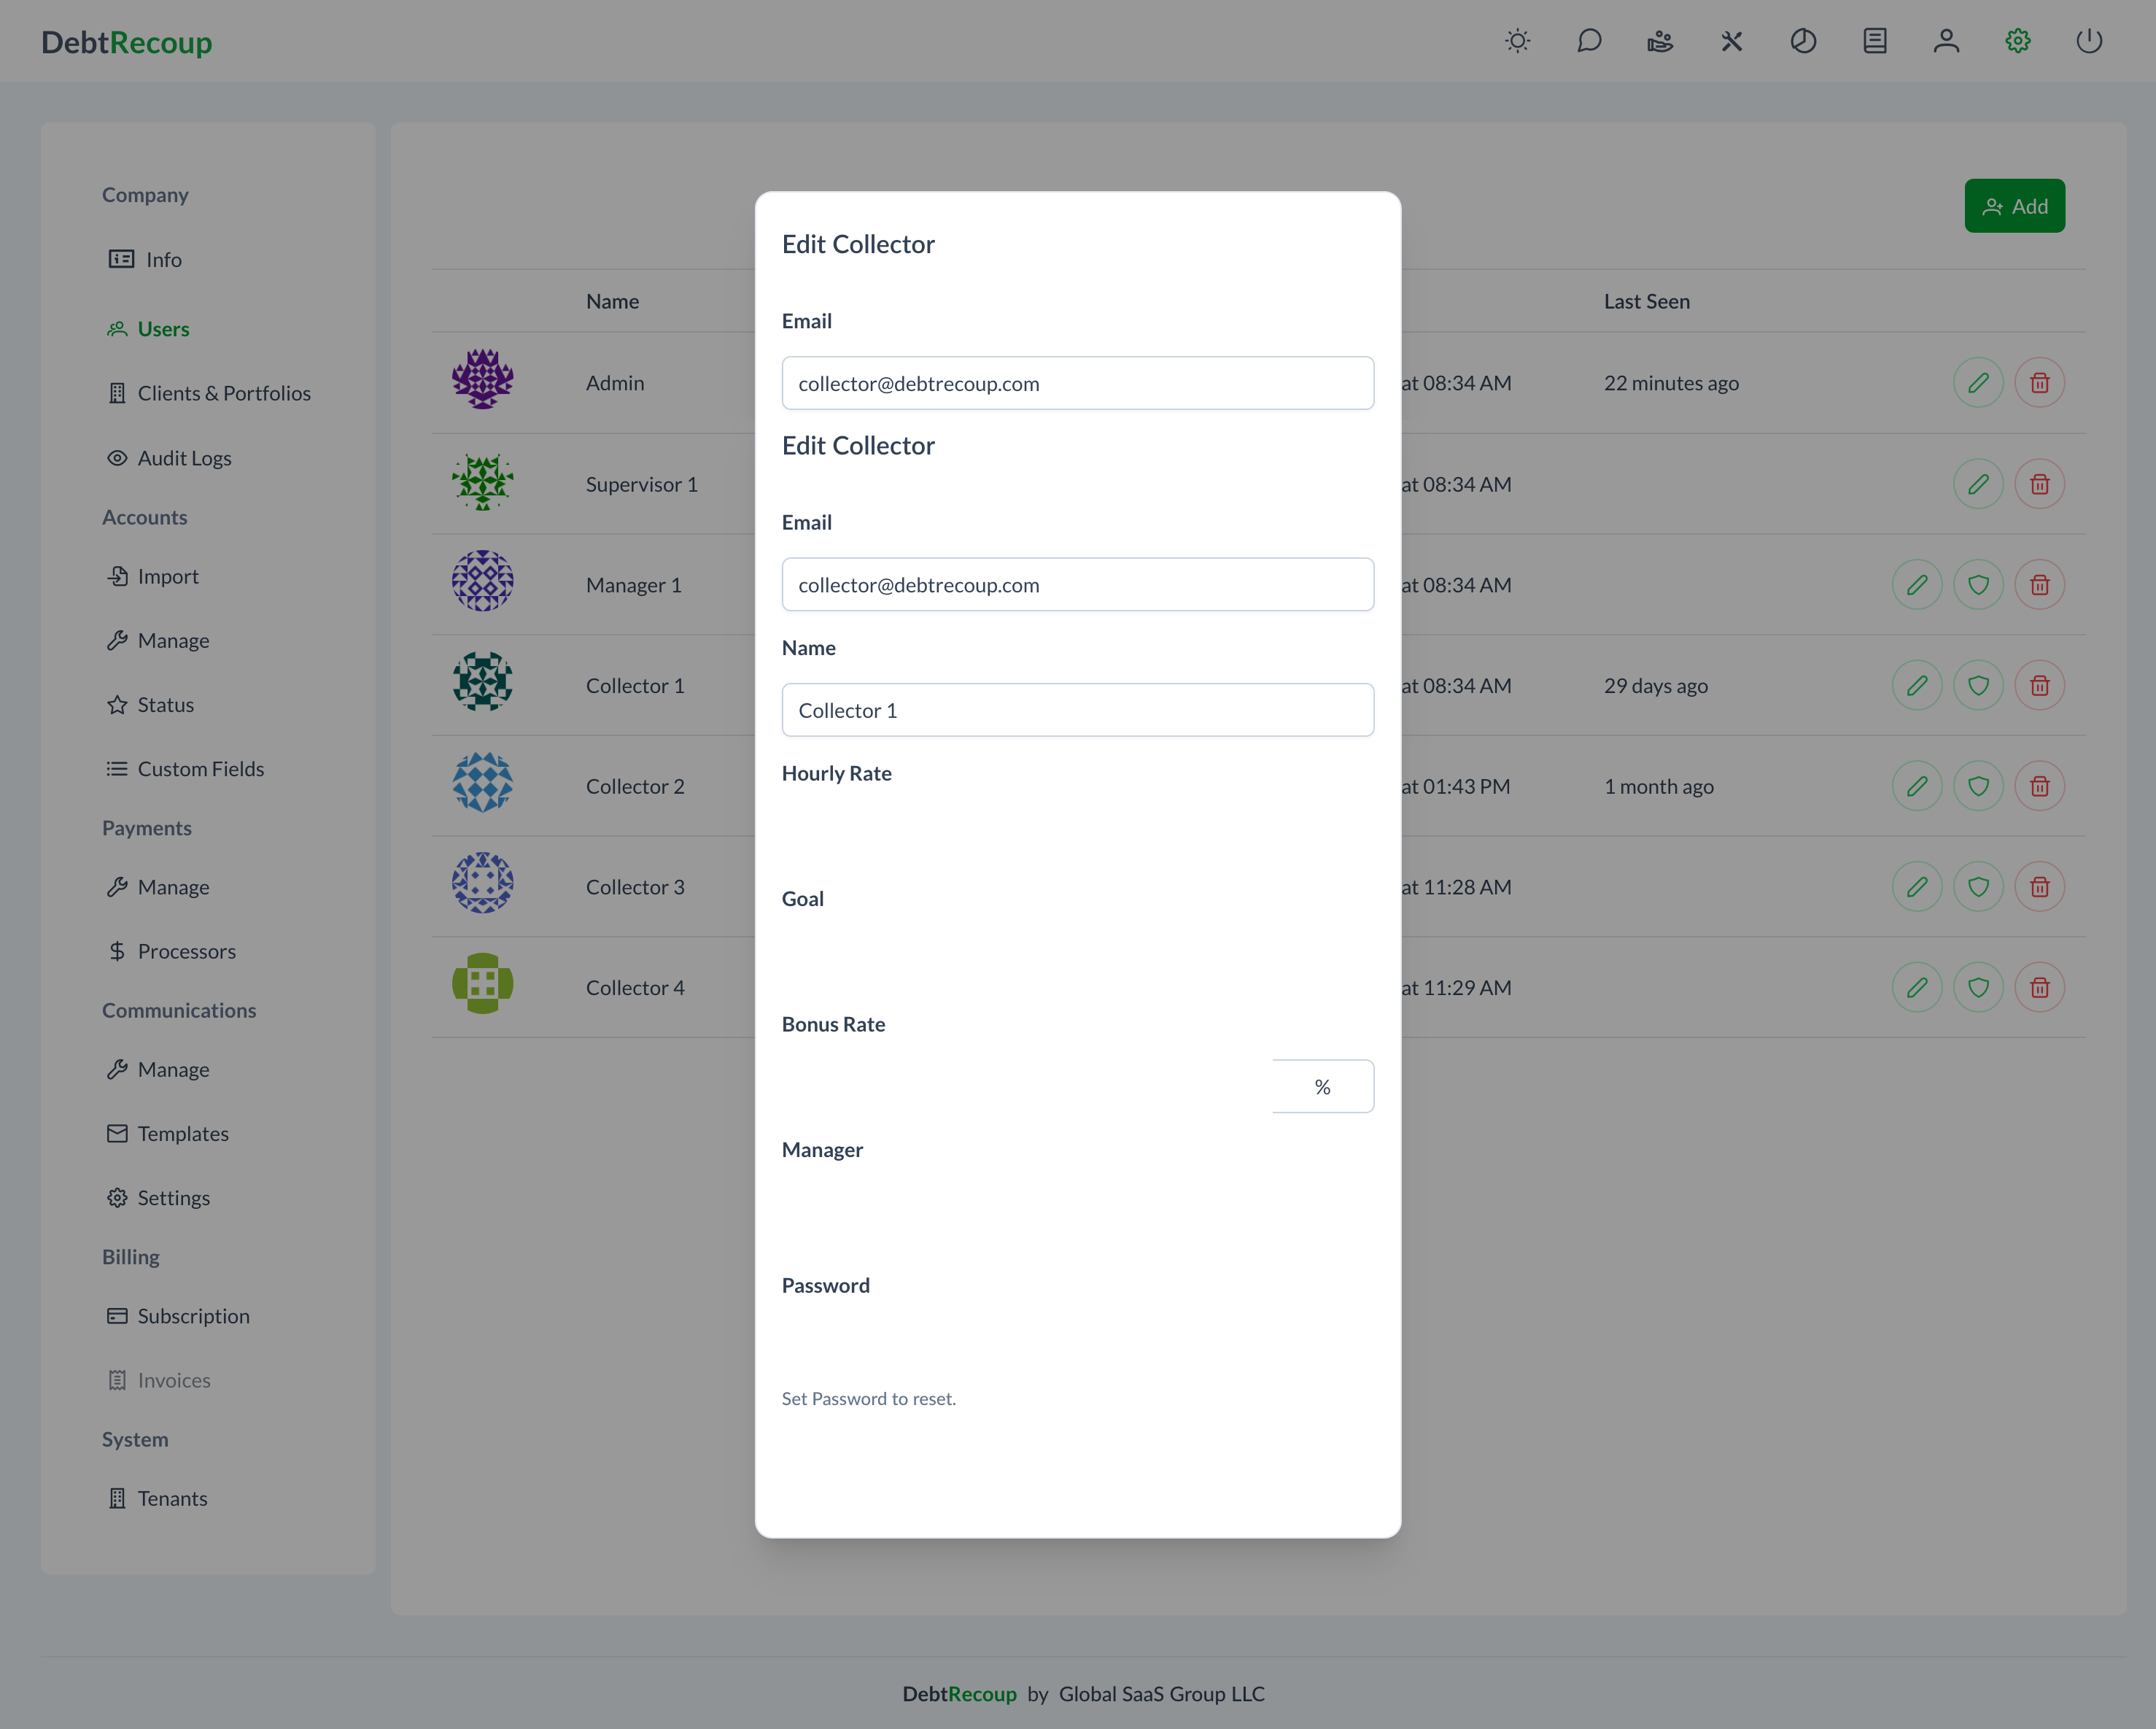
| Field | Description |
|---|---|
| Role | Select the user's role (required) |
| Login email address (required) | |
| Name | User's full name (required) |
| Hourly Rate | For commission tracking |
| Goal | Performance goal amount |
| Bonus Rate | Bonus percentage |
| Manager | Assign to a manager (Collectors only) |
| Password | Set a password, or leave empty to send join email |
- Click Save to create the user
If you leave the password field empty, the user will receive an email invitation to set up their account.
User Roles
DebtRecoup has four user roles:
Administrator
- Full system access
- Can manage all settings
- Access to all accounts and reports
- Can create and modify other users
Supervisor
- Access to administrative functions
- Can manage team performance
- View all accounts and reports
- Cannot modify system settings
Manager
- Access to management functions
- Can view team reports
- Oversee collector performance
- Can approve collector activities (if permission granted)
Collector
- Access to assigned accounts only
- Can process payments (if permission granted)
- Create notes and set callbacks
- No administrative access
Editing Users
To modify user information:
- Find the user in the list
- Click the Edit button (pencil icon)
- Update the necessary fields
- Click Save
User Permissions
Collectors and Managers have additional permission settings.
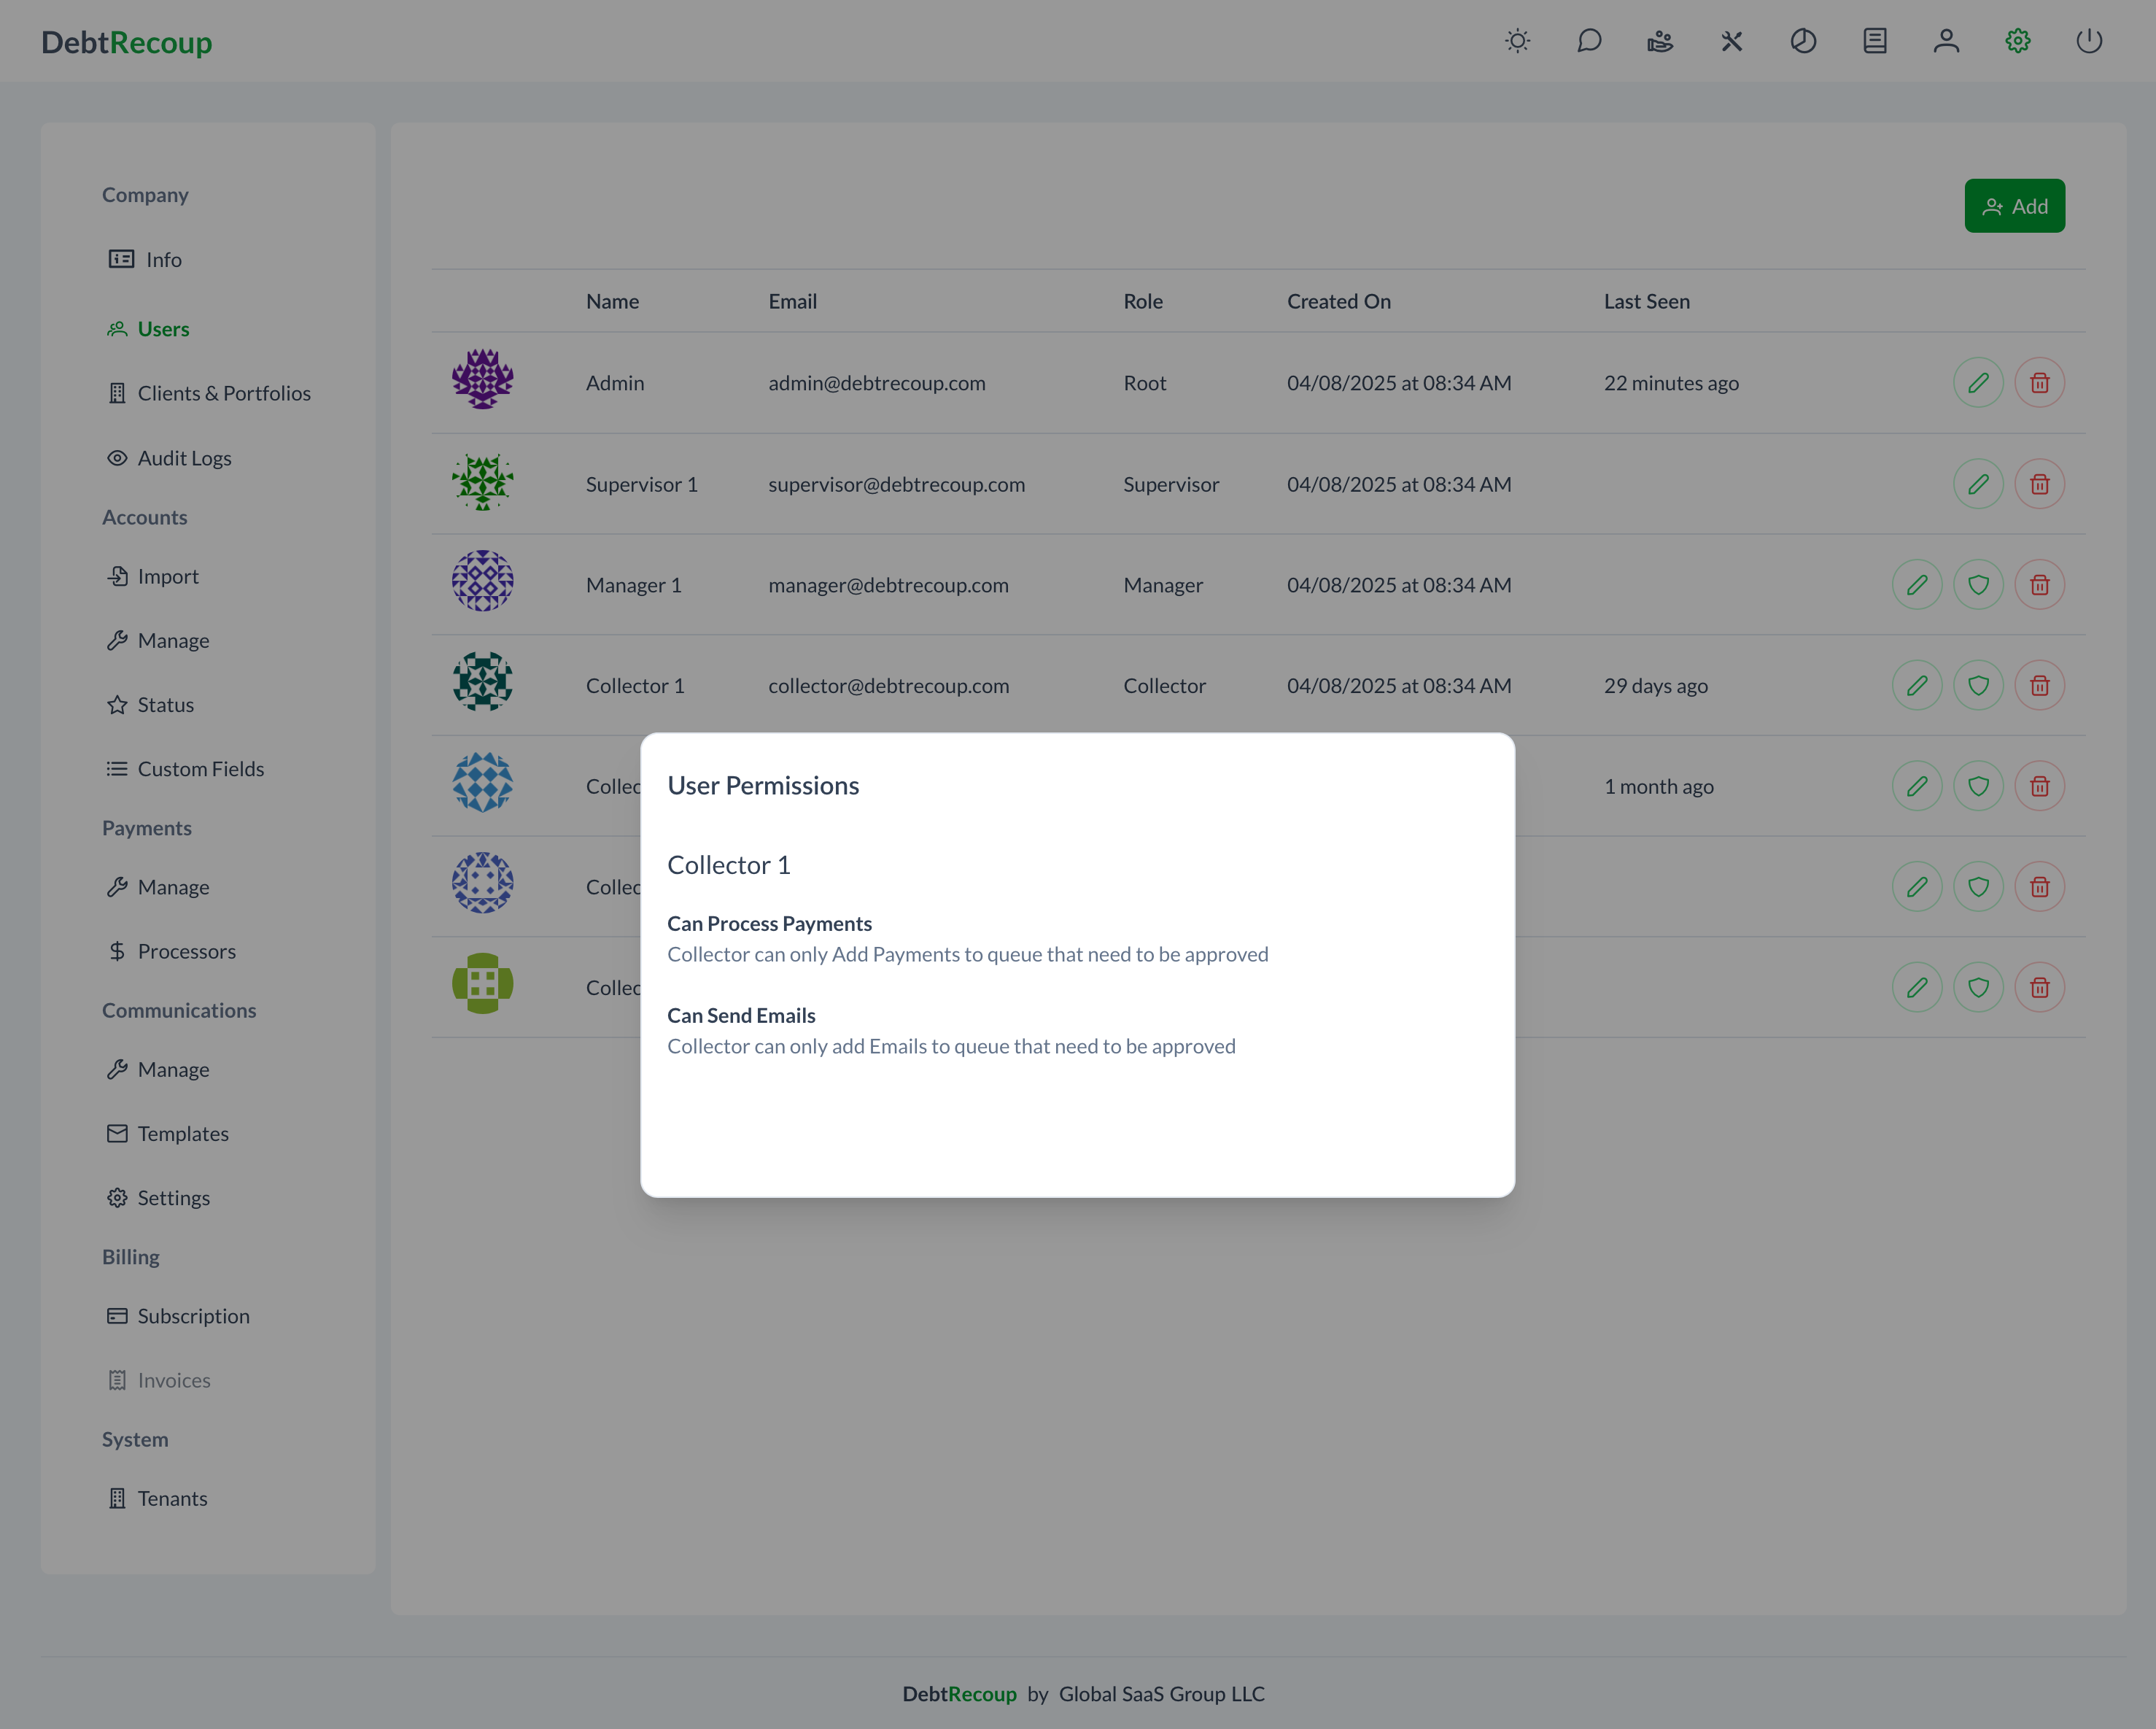
Setting Permissions
- Find the user in the list
- Click the Permissions button (shield icon)
- A dialog opens with available permissions:
For Collectors:
| Permission | Description |
|---|---|
| Can Process Payments | Allow user to record payments |
| Can Send Emails | Allow user to send emails |
| Can Send Text Messages | Allow user to send SMS |
For Managers (additional):
| Permission | Description |
|---|---|
| Can Approve Collector Payments | Approve payment submissions |
| Can Approve Collector Communications | Approve emails/texts |
- Check or uncheck permissions as needed
- Click Save
Deleting Users
To remove a user:
- Find the user in the list
- Click the Delete button (trash icon)
- Confirm deletion in the dialog
WARNING
Deleting a user is permanent. Consider whether you need to reassign their accounts first.
Password Management
Setting a Password
When creating a user, you can either:
- Enter a password directly in the Password field
- Leave the password empty to send an email invitation
Resetting a Password
To reset a user's password:
- Edit the user
- Enter a new password in the Password field
- Save changes
Best Practices
User Onboarding
- Create account before employee start date
- Assign appropriate role
- Set permissions as needed
- Either set temporary password or send email invitation
- Assign manager (for Collectors)
Regular Maintenance
- Review user list periodically
- Remove access for departed employees promptly
- Audit user permissions regularly
Troubleshooting
User Can't Log In
- Verify the email address is correct
- Reset their password
- Check that the account hasn't been deleted
Email Already Exists Error
- Each user needs a unique email address
- Check if user already has an account
- Look for existing users with that email
What's Next
- Company Settings - Configure company information
- Client & Portfolio Management - Set up client access
- Audit Logs - View user activity