Payment Portal
The Payment Portal is a customer-facing interface that allows debtors to view their account information and make payments online. It can be embedded on your company website.
Overview
The Payment Portal provides debtors with:
- Account balance and details
- Single payment processing
- Payment plan setup and management
- Secure payment method entry
- Payment confirmation
Accessing Payment Portal Settings
- Click the Administrator button (gear icon) in the top navigation
- Select Payments from the sidebar
- Click Portal
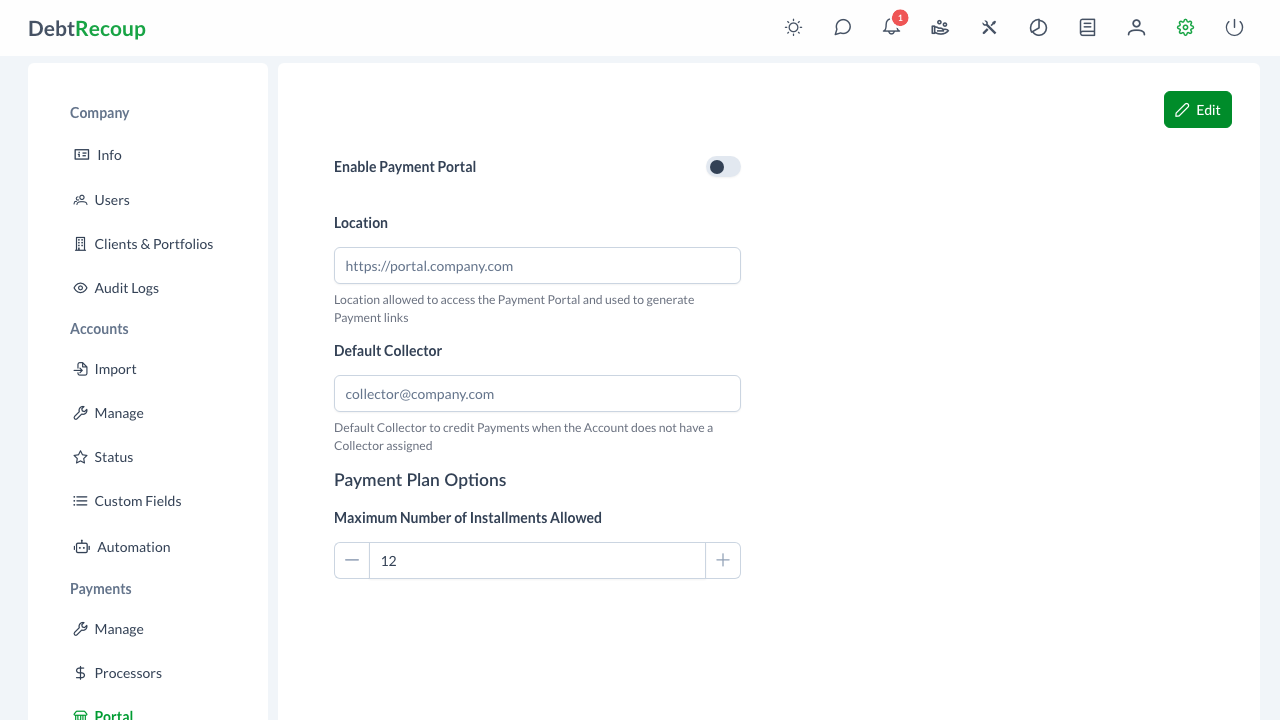
Configuration Settings
Enable Payment Portal
Toggle the portal on or off. When disabled, the embed code will not function and debtors cannot access the portal.
Location (URL)
The URL where your payment portal will be hosted. This should be a domain you control where you'll embed the portal code.
Example: https://payments.yourcompany.com
Embed Code
When the portal is enabled, an embed code is automatically generated. This JavaScript snippet loads the payment portal on your website.
Example embed code:
html
<div>
    <script async src="https://app.debtrecoup.com/portal/payment.js"></script>
</div>To copy the code:
- Click on the code field
- The code is automatically copied to your clipboard
- A "Copied!" confirmation appears
Default Collector
Select a user to credit payments when the account doesn't have an assigned collector. This ensures all portal payments are properly attributed.
Maximum Number of Installments
Set the maximum number of installments debtors can choose when setting up a payment plan through the portal.
- Minimum: 2 installments
- Maximum: 24 installments
- Default: 12 installments
Use the + and - buttons to adjust the value.
Setting Up the Payment Portal
Step 1: Configure Settings
- Click Edit to enter edit mode
- Toggle Enable Payment Portal on
- Enter your Location URL
- Select a Default Collector
- Set the Maximum Number of Installments
- Click Save
Step 2: Add the Embed Code
- Copy the generated embed code
- Add it to a page on your website at the URL you specified
- Test the portal by visiting the page
Step 3: Configure Payment Processor
Ensure you have a Payment Processor configured to process portal payments.
How the Portal Works
For Debtors
- Access - Debtor visits the portal URL or clicks a payment link
- Verify - Debtor enters identifying information to locate their account
- Review - Account balance and details are displayed
- Pay - Debtor chooses to make a single payment or set up a plan
- Confirm - Payment is processed and confirmation is shown
For Your Team
- Recording - Payments are automatically recorded on the account
- Attribution - Payment is credited to the account's collector (or default collector)
- Tracking - Payment appears in reports and account history
Portal Features
Single Payments
Debtors can make one-time payments for any amount up to their full balance.
Payment Plans
Debtors can set up payment plans with:
- Configurable number of installments (up to your maximum)
- Automatic payment scheduling
- Clear breakdown of payment amounts
Multiple Accounts
If a debtor has multiple accounts, they can select which account to pay from a list.
Payment Methods
The portal supports payment methods based on your configured Payment Processor.
Security
Account Verification
Debtors must verify their identity before viewing account information. The verification process requires information only the debtor should know.
Secure Payments
All payment information is transmitted securely and processed through your configured payment processor. Payment card details are never stored in DebtRecoup.
URL Protection
Only requests from your configured Location URL are accepted.
Troubleshooting
Portal Not Loading
- Verify the portal is enabled in settings
- Check that the embed code is correctly placed on your page
- Ensure the Location URL matches where the code is embedded
- Check browser console for JavaScript errors
Payments Failing
- Verify your payment processor is configured and active
- Check that a default payment processor is set
- Test the payment processor directly to ensure it's working
Debtor Can't Find Account
- Verify the account exists in DebtRecoup
- Check that the debtor is entering correct identifying information
Related Topics
- Payment Processors - Configure payment processing
- Payment Processing - Manual payment entry